Introduction
Maximize your Extreme wireless network by integrating with SecureW2 onboarding solutions. Integration takes hours, not days, and requires no forklift upgrades of existing infrastructure to deploy a WPA2-Enterprise network with EAP-TLS authentication. By using certificates, organizations can gain the security benefits of certificate-based authentication and configure them for SSL inspection, VPNs, wired security, and more.
This setup demonstrates how to integrate with existing Extreme APs to configure a certificate-based 802.1x-authenticated network for secure Wi-Fi access.
To complete this setup, you will need to have configured:
- Extreme Networks Access Points and Controller.
- A SecureW2 Network Profile.
Configuring SecureW2 RADIUS
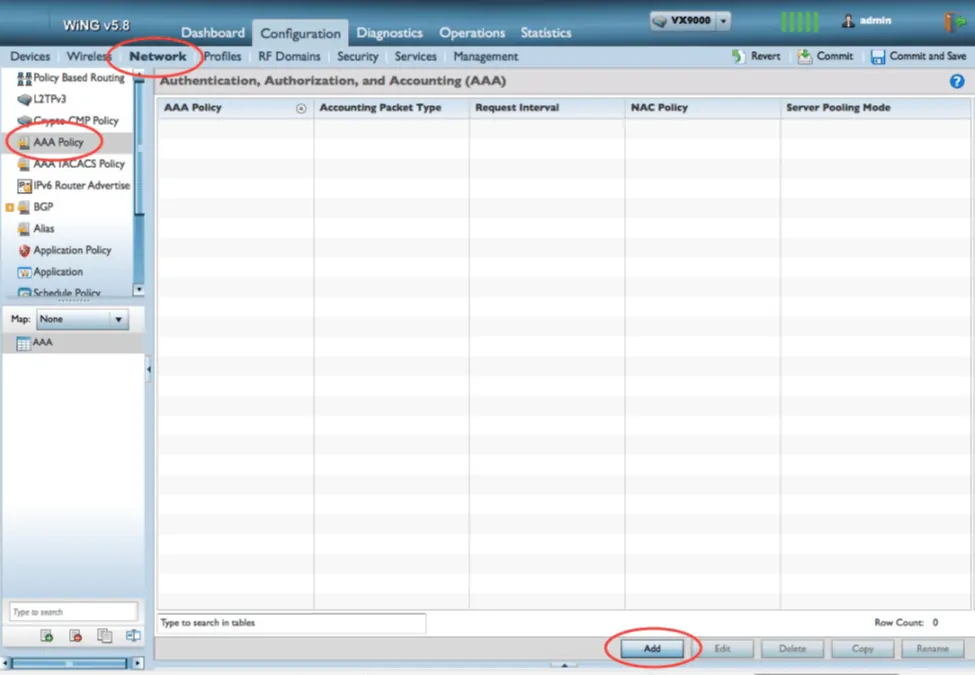
- In the Extreme Networks dashboard, click Configuration > Network.
- To create a new AAA Policy, click AAA Policy > Add.
- Add a name to the policy and click Continue.
- In the RADIUS Authentication tab, click Add to create a new RADIUS Server.
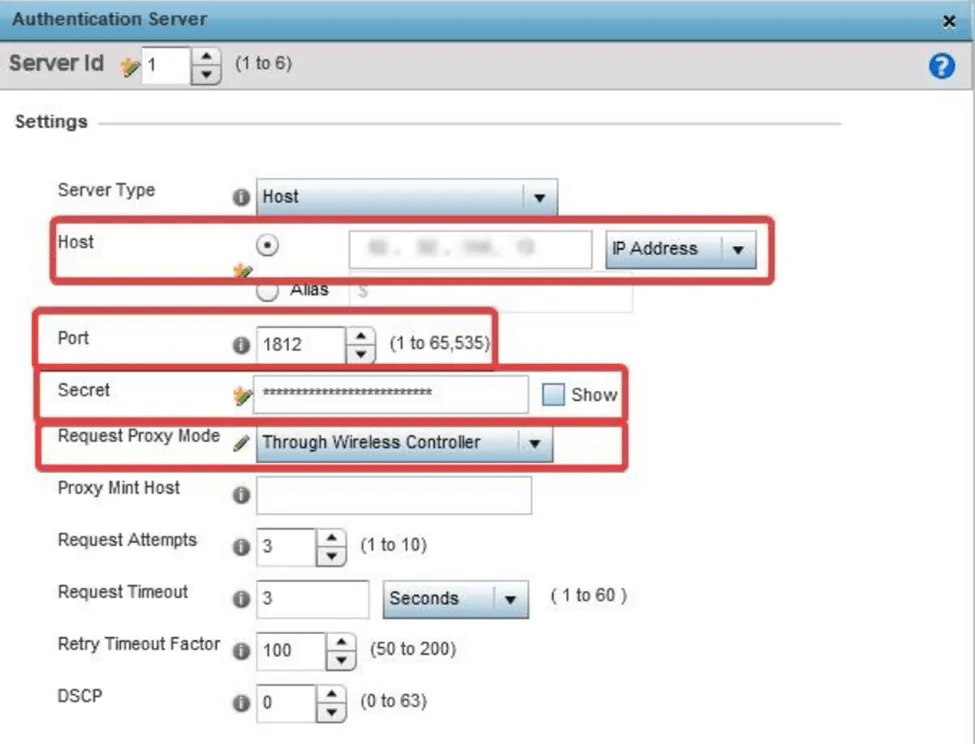
- In the Authentication Server window, update the following settings with information from the JoinNow Management Portal under RADIUS > RADIUS Configuration. Copy the required IP address and Port numbers:

- Update Host with the Primary IP Address.
- Update Port with the Port.
- Update Secret with the Shared Secret.
- Update Request Proxy Mode to Through the Wireless Controller.
Configuring Captive Portal
The captive portal configuration must include a DNS whitelist of SecureW2 servers that a client can access while still in the captive portal state.
- In the Extreme Networks dashboard, click Configuration > Services.
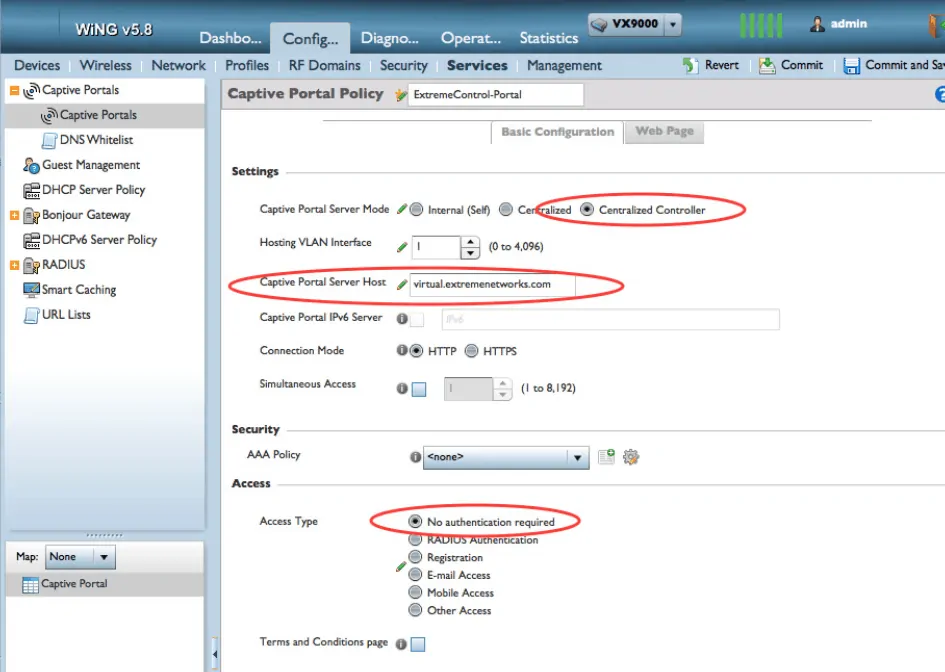
- To create a new configuration, click Captive Portals > Add.
- In Captive Portal Server Mode, select Centralized Controller.
- In the Captive Portal Server Host field, specify a nonexistent server host to which the web request would typically be sent.
- In the Access section, under Access Type, select No authentication required.
- Click OK to save the new policy.
- While still in the new Captive Portal Policy, scroll down to DNS Whitelist and click Add.

- Create DNS whitelist entries for both the IP address and hostname of the SecureW2 servers used on the network.
- Click OK > Exit.
- In Captive Portal Policies, select the newly created DNS Whitelist from the drop-down menu.
- Click OK > Commit:
- The final step is to assign the new policy to the Device Profiles in use.
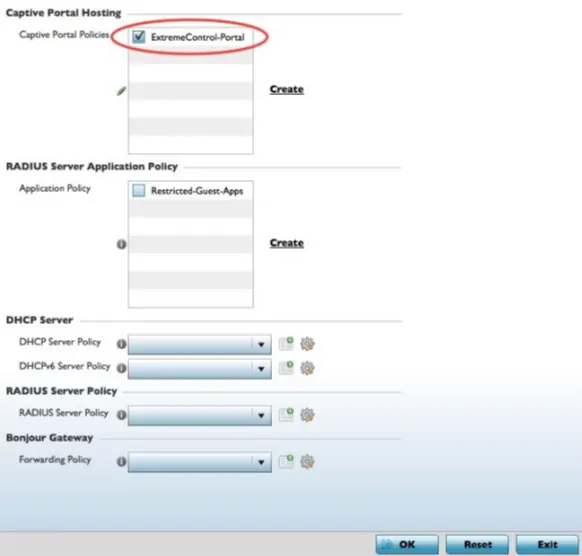
- Navigate to Configuration > Profiles, then select the profile you want to modify.
- Select the Services tab in the profile, then check the box next to the new Captive Portal Policy.
- Click OK > Commit.
Concluding Thoughts
A network secured with certificate-based authentication protects against all types of attacks from malicious outside users.
Also, by eliminating passwords, network connectivity is streamlined, and you can say goodbye to password-expiration policies that disconnect everyone from the network. Our onboarding solution allows users to connect easily, keeps all connections secure, and significantly reduces the number of IT tickets related to wireless connections.
So, if you’d like to try SecureW2 or have any questions about our integration with Extreme Networks, drop us a line! We are happy to introduce a network professional with Extreme expertise to facilitate a free trial and demonstrate how easy it is to deploy certificate-based authentication.
ExtremeControl and Extreme Networks are either registered trademarks or trademarks of Extreme Networks in the United States and/or other countries. Other trademarks, logos, and service marks used in this site are the property of SecureW2 or other third parties.